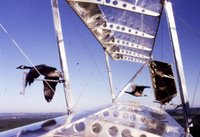
"Nest of Dragons" builds a Easy Riser

Tuesday, February 13, 2007

Progress so far (in the beginning)

I was happily surprized to see that the next day we worked on the Easy Riser there were 5 persons in the workshop. I could not say "No" to the new ones. So ... the group is now having 5 volenteers.

They are: (first name second name, year and type of lessons)(the first three are those whose picture is on the previous post)

Jimmy Verhoeven (5 latijn-wetenschappen)
Yoon Thoen (6 Economie-Moderne talen)
Thaïssa Kockelkoren (6 Latijn-Wetenschappen)
Adia Nabirova (6 Economie-Moderne talen)
Cedric Van Handenhove (6 Lassen-Constructie)
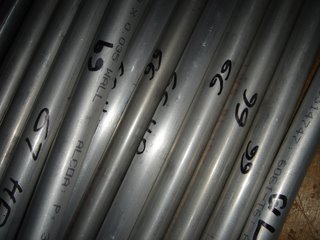
We first made the effort to debrur all the tubes. We made the extra control to see if ALL tubes had their partnumber on them to avoid errors in the future. Then we started assemblying the leading and trailing edge of the topwings with the extensions. It was my first effort with rivets. Real easy. But ... I had to make special efforts to get the right drill as the rivets are in inch and we live in Belgium.

Drawing the guiding lines on the tubes was not that easy. It is hard to draw lines along the tube correctly. I came up with the idea to use a metal plate and the workplate as supprt. Just place the plate (which has perfect parallel lines (I use a ruler)) to the side of the tube. Roll the tube so the line you want to extend is just above the plate. Now draw a line along the plate. You can see in the pictures how we used this method.

Good drilling is only possible after making a small dent with a sharp point on the places for the holes. If you don't do this you will continue to slide sideways.

Like mentioned in the plans we made guides for the placement of the tubes on the assembly fixture. Because we have a metal workshop we used metal plates. The thougest one to place was the one at the other end of the leading edge. The leading edge tube has to have EXACT 90° with the assembly fixture. For this I bought a longer square to guide us, but ... the fixture is lower than the side of the tube. So it was hard to get the square in contact with both. I used a wooden block which we fixed to the fixture and now we were able to place the square to the side of the tube AND place it againt something that is parallel with the fixture. The third guide was installed. Now we need to make that block to get the twist in the geometry of the wing right. It should be 2,5 inch high. After that we will be able to start adding the wingtip to the top right wing. Probably work for this Friday.

Tuesday, January 16, 2007

First meeting of "the group"

Yesterday at noon, we gathered for the first time. I only knew one person from a previous meeting. She helped me to find the other volenteers.

I gave info about what kind of airplane we will be making, what I expect from them and what they can expect from me. The usual bla-bla.

Let me introduce them with pictures first (as I don't know the right way to write their names yet). One person is still missing. Will join us friday, I hope.


Sunday, January 14, 2007

Parts arrived from the USA

While I was on holiday in France I got a phonecall that my box had arrived in the airport of Zavemtem (Belgium). Luckily a friend of me was capable to get the box. He had a van. That was a luck because the box was 3,5 m (about 11,5 feet) long.

Last week I was able to transport it to my school and open th
e box. At first I thought the box was hit hard to one side as some tubes were bend. But it seemed that those tubes were bend on purpose according to the plans. Lucky me! Buying a airtransport for a second time was not what I had hoped for.

When opening the box I found all kind of materials packed in smaller boxes and a lot of tubes assembled in packs. The packs had a paper with a number on it. At once I could see that the tubes were already at length and had proper ends to fit other tubes if needed. I realise that I need to place those numbers on each tube individually because I fear that the papers will not live long enough.

The other boxes had a very
understanding name on it. I will later describe the contains, because I had little time to see more details.

For the moment this kit looks like it is very organized. It makes me very happy to see that. Gives a good impression. I begin this project with
a heart filled with confidence.

One box (tube) I had to open at once. THE PLANS! I had to see them! Well, ... all looked fine. Very understandable. Very clear drawings and very non-misunderstandable explanations. A lot of extra notes to give more info about the importance of some issues. Again ... good for the confidence in the project.

The tube also included a poster-like advertis
ement. Waaaw! Great pictures of a Easy Riser in flight and in preparation for flight (setting up). Never saw these ones on the internet.

It became clear to me that at first I will need to make some kind of worktable. They advise to bold or glue some structure to the floor to ensure protection of the
distance between both supports. But ... I will not be allowed to do that in my school. So I will need to make some structure that can stand on its own. I guess it will become a metal structure made by the students of my school. More about that later.

On page 1 I saw already one item I did not understand. it mentions "#30 drills" . To us, Europeans, that is Japanese! It seems that the USA uses some kind of codes for drills. You can read more about those codes at http://www.madison.k12.wi.us/toki/teched/codrills.htm . It tells that #30 stands for 3,1 mm.

Well, on monday I will invite the three volenteers for the first time in the workshop. We will look at the parts. Talk about the mate
rials and the wanted end-result (finished metal frame of Easy Riser) and about the danger while working with the materials and the possible dangers for the pilot for mis-use of materails.

As always ... I will report from time to time. At first I will introduce the volenteers.

Saturday, November 11, 2006

seat for a Easy Riser

When I saw the video of the learning flights of William "Bill" Lishman on his own site (www.williamlishman.com) I saw Bills legs go from side to side. Euh ... it kind of scared me. But ... I knew already that video on the site of Mr. John Moody. There I saw a kind of seat and Mr. Moody's legs did no longer shake from left to right.

I wanted his a seat! I got a email from Mr. Moody and it tells that the seat is not so hard to make if you have contacts with persons who work with boat sails. I got a picture of the used seat and all seemed ok. But ... on the video of Mr. Moody I saw him slide back and forwards on that seat. I didn't like that idea.


Mr. Moody was talking before about some swingseat that Mr. Mauro was working on. I am not sure if that was the seat I saw in the Easy Riser Yahoo discussion group. But ... there it was! The most easy to get seat. It is a paraglider seat that hangs on its usual clamps to a new strap that hangs on the topjoint of the wings. It is a very solid point to hang on. All you need to do is find some kind of strap that can take the weight (calculate also the g-forces!).

The only thing I didn't see on the picture were extra shoulder straps. I saw them in the FLY AWAY HOME film. They are used to carry the glider. I guess I will go for a combination of paraglider seat and shoulder straps.

Moody's additional set of plans

Mr. John Moody has two sets of plans for the Easy Riser. One is about the installation of a engine, the other is about a remarkable landinggear that is able to land like a crab when there is a crosswind.

Both were 25$ when I bought them. Paying them is easy! Mr. Moody send a email to me from Paypal (Paypal is a kind of money transfer system on-line). You simply click the link it gives you and register yourself (you need VISA or another credit card). Once you are registered it all goes easy.

I have now both sets of plans. BOTH ARE WORTH HAVING! The set of the engine has no need for extra help. They drawings are very clear. The set about the landinggear is OK, but ... without pictures a bit hard to understand. Of course ... Mr. Moody installs a CD with the needed pictures in the package. Now no problem at all!

By the way ... very clever thinking to land like a crab. Great job, Mr. Moody.

Getting the money there to order

I am not a American, so paying the money for the order is not that straightforward. My bank needed more data to be able to send the money to Mr. Larry Mauro.

Mr. John Moody gave me the following data and my banc no longer had problems getting the money there. If Mr. Mauro does not change his banc-account you will be able to use the same.
°°°°°°°°°°°°°°°°°°°°°°°°°°°°°°°°°°°°°°°°°°°°°°°°°
swift code: SNTRUS3A
international routing number: 061000104
Larry's account number: 1000047867220

Bank address: Sun Trust Bank
6745 N. Church Ave.
Mulberry, FL 33860
USA

Bank phone number: 863-644-1922
°°°°°°°°°°°°°°°°°°°°°°°°°°°°°°°°°°°°°°°°°°°°°°°°°
DO NOT FORGET: at the same time send the hard copy of your order to Mr. Mauro. If you didn't get it by surface mail, you probably got it by email from Mr. Moody in his first email with all those pdf-files with information. Just fill in in and send it to:

Larry Mauro, P.O. Box 374, Mulberry, FL, 33860, USA.

Friday, November 03, 2006

Why buying a Easy Riser?

Who did dream as a kid to fly? Who wanted to share the air with those birds? I guess many of us did. Many still think it is not possible. They think it is too expensive or think it is too demanding. Well, when I was a kid it was not. Magazines were filled with rather very basic airplanes that flew not so fast, but ... they flew good. They didn't have those fancy options like the bigger airplanes, but ... that made them very easy to use. "Better 1 button you know how to use than 100 which you don't know"

Sadly ... things changed and the small airplanes (ultralights) became more and more advanced. They became speedy, they got lots of options, they became ... EXPENSIVE! Many will see that the small airplanes are no longer low-budget.

It is sad to see that people who just want to leave the ground and buzz around the local church tower (just kidding!) only can buy those advanced airplanes. They would be super happy to have such a old-timer. But ... they are no longer available.


Sorry, I wrote a mistake. They WERE no longer available. I recently found out that the airplane from which it all started is back into production. The EASY RISER of Mr. Larry Mauro is back! Really! Go see www.pioneerflyer.com . Yes, it is that glider which you know from the movie "Fly Away Home".

Did you know that it was the first motorized ultralight? Mr. John Moody was the first to place a engine on this bi-plane flying wing hangglider. From that moment on he was able to get to heights from which he was able to soar. This idea evolves a small airplane with a landinggear. Now the ultralights were really born! And people were using this Easy Riser to learn how to fly.

First from a small hill, then higher with the help of a small engine (or higher hill) and later they too placed a landinggear and a bit larger engine and had their own ultralight.

It was a easy to make homebuilt, not expensive at all, easy to store because it could be dismounted and folded together and ... it was not using a lot of fuel with that small engine. That sounded good at the old days. Euh ... is it different now? I guess not. I am sure that many are still looking for a airplane that fits such a description. Why search further? It is still there!

I am a true believer in BULM (Basic UltraLight Motorized). It is a word I invented. In my website I made a directory off the BULMs I know. Euh ... sadly ... it is a short list. Not much choice! What makes this Easy Riser so special to me? Well, it is a slow flyer which gives it a slow landingspeed and that comes in handy as a beginner pilot. It can easily be stored in a garagebox. I will even try to store it when the car is INSIDE my garage. Just hang it dismounted on the ceiling. Its flying wing design gives a good-stall-behavior. And ... its use is not that costy due to the small engine it needs. All in all ... sounds perfect.

I will dedicate this blogsite to the progress of the building and flying of this airplane so others can better understand the Easy Riser and be able to better see its advantages when compared to more modern airplanes.